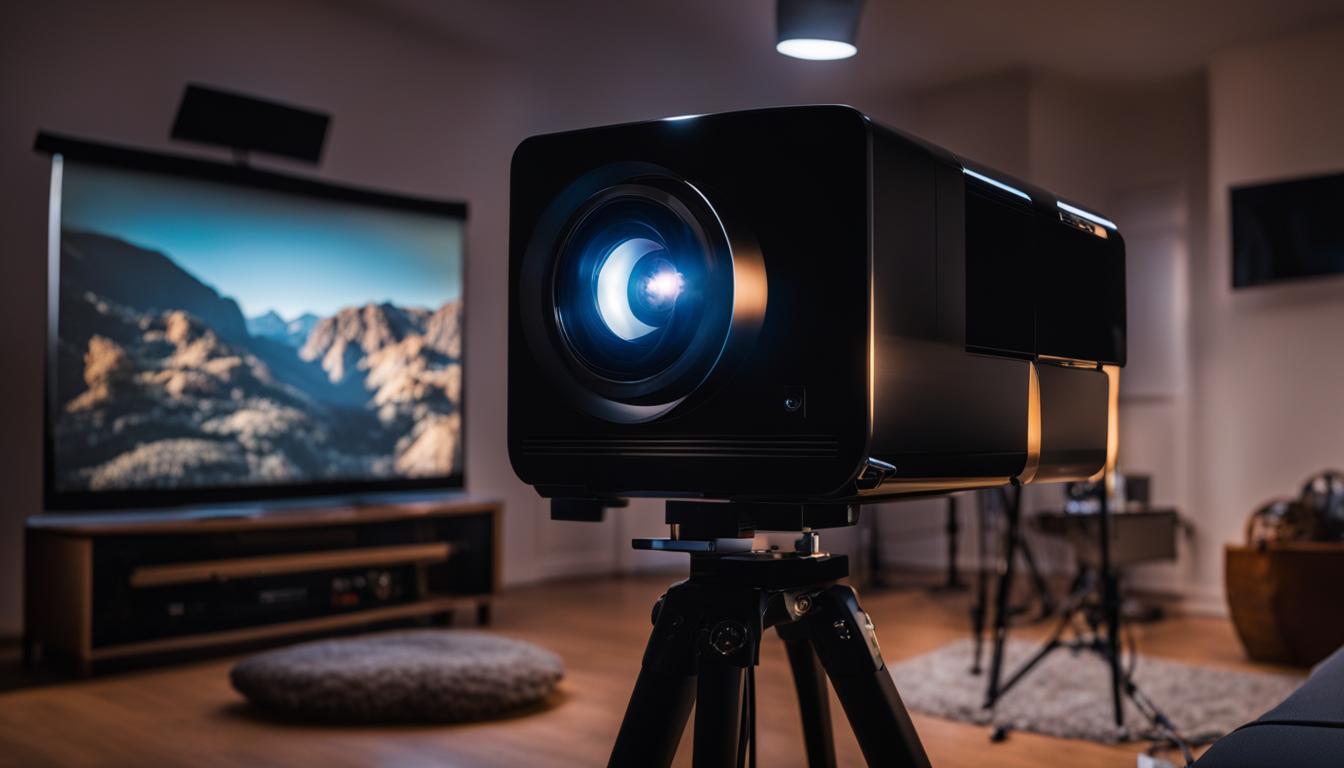
Welcome to our easy-to-follow guide on setting up the Dr J Projector! Whether you’re a first-time user or just looking for some installation tips, we’ve got you covered. In this tutorial, we’ll provide you with everything you need to know to get your Dr J Projector up and running in no time.
Our step-by-step instructions will walk you through the entire process, from unpacking the projector to connecting it to your devices. We’ll also share some handy tips and tricks along the way to ensure a successful installation.
With our Dr J Projector setup guide, you’ll have all the information you need to create your own home theater experience. So let’s dive right in and get started with our easy instructions for Dr J Projector setup!
Stay tuned for more sections of our Dr J Projector setup tutorial, where we’ll cover common troubleshooting solutions, tips for optimizing your viewing experience, and much more. Get ready to take your entertainment to the next level with the Dr J Projector!
DR. J Projector HDMI Not Working – Troubleshooting Solutions
If you’re experiencing HDMI connectivity issues with your DR. J Projector, don’t worry. There are several troubleshooting solutions you can try before seeking professional assistance. Follow these step-by-step instructions to resolve HDMI problems and get your projector up and running smoothly.
Check the Input Source
The first thing you should do is check the input source on your DR. J Projector. Ensure that the HDMI cable is securely connected to both the projector and the source device, such as a laptop or Blu-ray player. Sometimes a loose connection can cause HDMI signal disruptions.
Verify Dolby Digital Plus Settings
Dolby Digital Plus settings can sometimes interfere with the HDMI connection. Access the projector’s settings menu and navigate to the audio settings. Disable Dolby Digital Plus if it’s enabled and test the HDMI connection again.
Ensure HDCP Compatibility
HDCP (High-bandwidth Digital Content Protection) ensures that copyrighted content is played only on authorized devices. If your projector is not HDCP compatible, it may not display certain content through the HDMI connection. Check your projector’s specifications to confirm if it supports HDCP.
Test the HDMI Cable
If all else fails, it’s time to test the HDMI cable itself. Replace the current cable with a known working one and see if the issue persists. Sometimes a faulty cable can be the culprit behind HDMI problems.
| HDMI Troubleshooting Checklist |
|---|
| Check the input source and ensure a secure connection |
| Verify Dolby Digital Plus settings and disable if necessary |
| Confirm HDCP compatibility of the projector |
| Test the HDMI cable with a known working one |
By following these troubleshooting solutions, you can overcome HDMI issues and enjoy a seamless viewing experience on your DR. J Projector. If the problem persists, don’t hesitate to reach out to customer support for further assistance.
DR. J Projector Can’t Connect to Phone – Troubleshooting Tips
If you’re facing difficulties connecting your phone to the DR. J Projector, don’t worry, we’ve got you covered. This section will provide you with troubleshooting tips to resolve any connection issues you may encounter. Whether you have an Android or iPhone, connecting your phone to the DR. J Projector is made easy with the right adapters and settings. Follow the steps below to troubleshoot and establish a successful connection.
Connecting an Android Phone:
- Start by ensuring that the DR. J Projector is powered on and connected to a power source.
- Connect the USB-C or Micro USB-to-HDMI adapter to your Android phone.
- Connect one end of the HDMI cable to the adapter and the other end to the HDMI input on the projector.
- Make sure your phone is set to MHL mode or enable HDMI output in the settings.
- Once the connection is established, select the HDMI input source on the projector, and you should see your phone’s screen projected.
Connecting an iPhone:
- Ensure that the DR. J Projector is powered on and connected to a power source.
- Connect the Lightning-to-HDMI adapter to your iPhone.
- Connect one end of the HDMI cable to the adapter and the other end to the HDMI input on the projector.
- On your iPhone, go to Settings, then Display & Brightness, and enable Screen Mirroring.
- Select the name of the HDMI adapter from the list of available devices, and your iPhone screen will be mirrored on the projector.
By following these troubleshooting tips, you should be able to connect your phone to the DR. J Projector effortlessly. Remember to ensure that you have the necessary adapters and cables for your specific phone model. If you’re still experiencing difficulties, refer to the user manual or contact DR. J Projector’s customer support for further assistance.
| Issue | Troubleshooting Steps |
|---|---|
| Phone not recognized |
|
| No audio on projector |
|
| Poor video quality |
|
With these troubleshooting tips and solutions, you should now be able to establish a seamless connection between your phone and the DR. J Projector. Enjoy the convenience of projecting your phone’s screen onto a larger display and enhance your viewing experience.
DR. J Projector Has No Sound – Troubleshooting Guide
If you’re experiencing issues with the sound on your DR. J Projector, don’t worry! This troubleshooting guide will help you identify and fix the problem. Here are some steps you can take to address the issue:
- Check the video format compatibility: Ensure that the video file you’re playing on the projector is supported by the device. Incompatible formats may result in no sound.
- Adjust audio settings for streaming platforms: If you’re streaming content from platforms like Netflix, make sure the audio settings within the app are properly configured. Sometimes, the audio may be muted or set to a low volume by default.
- Test audio connections: Ensure that the audio cables or HDMI connections are securely plugged into the projector and the audio source (e.g., DVD player, gaming console). Loose or faulty connections can lead to no sound.
- Verify the projector is not muted: Check the projector’s settings to ensure that the audio is not muted. There may be a dedicated mute button on the remote or a setting in the menu to control the audio output.
- Verify the earphone connection: If you’re using earphones with the projector, check if they are properly connected. Sometimes, the sound may be directed to the earphones instead of the projector’s built-in speakers.
By following these troubleshooting steps, you should be able to resolve the sound issues on your DR. J Projector. If the problem persists, refer to the projector’s user manual or contact customer support for further assistance.
Now that we’ve covered sound troubleshooting, let’s move on to the next section, where we’ll discuss another common issue with the DR. J Projector: black spots on the projection image.
Table: Common Causes of No Sound on DR. J Projector
| Cause | Solution |
|---|---|
| Video format compatibility | Check the compatibility of the video file and convert if necessary. |
| Audio settings for streaming platforms | Adjust the audio settings within the streaming app. |
| Loose audio connections | Ensure all audio cables and connections are secure. |
| Projector muted | Check the projector’s settings to ensure audio is not muted. |
| Incorrect earphone connection | Verify proper connection of earphones, if used. |
DR. J Projector Has Black Spot – Solutions and Fixes
If you notice a black spot on the projection image of your DR. J Projector, there are several solutions and fixes you can try to resolve the issue. Here are some troubleshooting steps to help you address black spots on your DR. J Projector:
1. Clean the Lens
Start by cleaning the lens of your projector. Accumulated dust, smudges, or fingerprints on the lens can cause distortions in the projected image. Gently wipe the lens using a microfiber cloth or lens cleaning solution to remove any dirt or debris.
2. Remove Sundries on Vents
Black spots may also occur due to obstructions on the projector’s vents. Check for any dust, lint, or other foreign particles blocking the airflow. Use a can of compressed air or a soft brush to clean the vents and ensure proper ventilation for the projector.
3. Check for Overheating
Overheating can contribute to the appearance of black spots on the projected image. Ensure that your projector has sufficient ventilation and is not positioned near heat sources. If the black spots persist even after addressing overheating, it is recommended to seek professional assistance for further diagnosis and repair.
By following these troubleshooting steps, you can effectively address black spots on your DR. J Projector and enjoy a clear and uninterrupted viewing experience.

| Possible Causes | Solutions |
|---|---|
| Dust or dirt on the lens | Ensure proper ventilation and positioning of the projector, and seek professional assistance if needed |
| Obstructions on the vents | Clear the vents of any dust or debris using compressed air or a soft brush |
| Overheating | Ensure proper ventilation and positioning of the projector, seek professional assistance if needed |
DR. J Projector Overheating Troubleshooting – Tips for Prevention and Repair
If your DR. J Projector is experiencing overheating issues, it can be frustrating and impact your viewing experience. Overheating is a common problem that can occur due to various factors, such as prolonged use, insufficient ventilation, or external heat sources. However, there are several troubleshooting tips and preventive measures you can follow to address and prevent overheating on your DR. J Projector.
Proper Ventilation and Cooling
- Ensure that the projector is placed on a flat, stable surface that allows for proper airflow.
- Keep the projector away from walls or other objects that may block the vents.
- Clean the projector’s vents regularly to prevent dust accumulation and improve airflow.
- If using the projector in a confined space, consider using a cooling pad or external fan for additional ventilation.
Scheduling Breaks and Avoiding Heat Sources
- Do not run the projector continuously for extended periods. Take short breaks to allow the projector to cool down.
- Avoid placing the projector near heat-producing devices such as radiators, amplifiers, or gaming consoles.
- Use a lower brightness setting on the projector, as higher brightness levels can generate more heat.
Checking the Fan and Conducting Maintenance
- Regularly check the projector’s fan for any obstructions or damage. Clean or replace the fan if necessary.
- Ensure that the fan is functioning properly and providing adequate cooling to the projector.
- Check for any firmware or software updates for your DR. J Projector. These updates may include improvements to cooling and overall performance.
By following these troubleshooting tips and preventive measures, you can minimize the risk of overheating and enhance the longevity and performance of your DR. J Projector. If the issue persists even after trying these solutions, it is recommended to contact customer support or seek professional assistance for further diagnosis and repair.
| Troubleshooting Tips | Preventive Measures | Additional Assistance |
|---|---|---|
| Ensure proper ventilation and cooling | Place the projector on a flat surface and keep it away from heat sources | Contact customer support or seek professional assistance if the issue persists |
| Schedule breaks for the projector | Use lower brightness settings to reduce heat generation | Clean the projector’s vents regularly |
| Check the fan for obstructions or damage | Consider using external cooling solutions in confined spaces | Check for firmware and software updates |
Remember, maintaining proper ventilation, scheduling breaks, and conducting regular maintenance are essential for keeping your DR. J Projector functioning optimally. By following these tips, you can enjoy uninterrupted viewing and extend the lifespan of your projector.
DR. J Projector Software Update – How to Update and Upgrade
In order to optimize the performance and functionality of your DR. J Projector, it is essential to keep the software up to date. Regular software updates provide bug fixes, feature enhancements, and improved compatibility with external devices. This section will guide you through the process of updating and upgrading the software on your DR. J Projector to ensure you have the latest features and optimal performance.
Automatic Software Update
One of the easiest ways to update the software on your DR. J Projector is through the automatic update feature. This feature is designed to check for software updates periodically and notify you when an update is available. When prompted, simply follow the on-screen instructions to install the update. It is recommended to connect your projector to a stable internet connection before initiating the automatic update process to ensure a smooth and uninterrupted download.
Manual Software Update
If you prefer to manually update the software on your DR. J Projector, follow these simple steps:
- Visit the official DR. J website and navigate to the Support or Downloads section.
- Search for the software update specifically designed for your projector model.
- Download the latest software update file to your computer.
- Transfer the downloaded file to a USB flash drive.
- Insert the USB flash drive into the USB port of your DR. J Projector.
- Navigate to the Settings menu on your projector.
- Select the Software Update option.
- Choose the Manual Update option.
- Follow the on-screen instructions to browse and select the software update file from the USB flash drive.
- Initiate the software update process.
- Wait for the update to complete and the projector to restart.
If you encounter any difficulties during the manual update, it is recommended to contact the DR. J customer service for further assistance. They can provide you with the necessary guidance and ensure you have access to the latest software updates for your projector.
| Benefits of Software Update | How it Enhances Your Experience |
|---|---|
| 1. Improved Performance | Enhances the overall performance and stability of your DR. J Projector. |
| 2. New Features | Introduces new features and functionalities to expand your viewing options. |
| 3. Compatibility | Ensures compatibility with the latest external devices and media platforms. |
| 4. Bug Fixes | Addresses any known software bugs or issues for a smoother user experience. |
By regularly updating the software on your DR. J Projector, you can enjoy an improved viewing experience with enhanced performance, new features, and seamless compatibility with various devices and platforms.
DR. J Projector Setup Guide – Step-by-Step Instructions
If you’re new to setting up a DR. J Projector, you’re in the right place. This step-by-step guide will walk you through the entire installation process, ensuring that you can enjoy your projector to the fullest. Let’s get started!
Table DR. J Projector Setup Guide
| Step | Instructions |
|---|---|
| Step 1 | Choose a suitable location for your projector. Ensure that it is on a flat surface and has enough ventilation to prevent overheating. |
| Step 2 | Adjust the distance between the projector and the screen or wall to achieve your desired screen size. Refer to the user manual for recommended distances. |
| Step 3 | Connect the power cord to an electrical outlet and the projector. Make sure the power source is stable. |
| Step 4 | Calibrate the keystone correction to ensure a rectangular image. Use the keystone knob or the keystone correction feature in the projector’s settings. |
| Step 5 | Adjust the focus ring until the image appears sharp and clear. Take your time to achieve the best possible picture quality. |
| Step 6 | If you want to connect external devices such as a laptop or game console, use the appropriate cable and connect it to the relevant port on the projector. |
| Step 7 | Power on the projector and select the correct input source. You should now see your content displayed on the screen. |
That’s it! You have successfully set up your DR. J Projector. Now, sit back, relax, and enjoy your favorite movies, shows, and games on the big screen.
Note: It’s always recommended to refer to the user manual provided with your DR. J Projector for detailed instructions specific to your model.
With this step-by-step guide, you’ll be able to set up your DR. J Projector with ease. Whether you’re hosting a movie night or giving a presentation, following these instructions will ensure a successful installation and optimal viewing experience. So, gather your friends, grab some popcorn, and get ready to enjoy the immersive world of the DR. J Projector!
How to Adjust the Image Size of DR. J Projector – Tips for Perfect Projection
If you want to achieve the perfect image size on your DR. J Projector, it’s essential to know how to adjust it effectively. This section provides you with valuable tips to ensure optimal projection for an immersive viewing experience.
Optimal Projection Distance
The first step in adjusting the image size is determining the ideal projection distance. Placing the projector too close or too far from the screen can result in distorted or reduced image quality. To find the perfect distance, refer to the manufacturer’s guidelines or consult the projector’s user manual. It’s crucial to consider the projector’s throw ratio, which determines the distance needed to achieve a particular image size.
Zoom and Focus Adjustment
Once you’ve found the right projection distance, you can fine-tune the image size using the zoom and focus adjustment features on your DR. J Projector. The zoom function allows you to enlarge or shrink the image without moving the projector. Adjust it according to your desired screen size. Additionally, use the focus ring to ensure that the image is clear and sharp.
Screen Aspect Ratio
The aspect ratio of your screen should match the aspect ratio of the content you’re projecting. Most projectors and screens have a 16:9 aspect ratio, which is suitable for widescreen movies and HD content. However, if you plan to display content with a different aspect ratio, such as 4:3 for older video formats, make sure to adjust the settings on both the projector and the source device to avoid image distortion.
| Projection Distance | Recommended Image Size |
|---|---|
| 8 feet | 80 inches |
| 10 feet | 100 inches |
| 12 feet | 120 inches |
Remember, finding the perfect image size is a matter of personal preference and the specific requirements of your viewing environment. Take the time to experiment with different adjustments until you achieve the desired results. By following these tips, you can optimize the image size on your DR. J Projector and enjoy a fantastic viewing experience.
How to Fix If DR. J Projector Has Blurry Image – Troubleshooting Steps
If you’re experiencing a blurry image on your DR. J Projector, don’t worry, there are troubleshooting steps you can take to improve the image quality. Follow these tips to resolve the image quality issues and enjoy clear, sharp visuals on your projector.
1. Adjust the Keystone and Focus Ring
The keystone and focus ring are essential for achieving a clear image on your DR. J Projector. The keystone adjustment helps correct any image distortion caused by the projector’s angle, while the focus ring ensures the image is sharp and in focus. Experiment with these settings until you find the optimal configuration for your viewing environment.
2. Check for Max Screen Size Limitations
Blurriness can occur if you exceed the maximum screen size recommended for your DR. J Projector. Refer to the projector’s specifications and ensure that your screen size is within the recommended range. If the projected image is too large, it can result in a loss of image clarity. Adjust the screen size accordingly to improve the image quality.
3. Create a Dark Environment for Better Viewing
Ambient light can affect the perceived image quality of your DR. J Projector. To minimize blurriness, create a dark environment by closing curtains or blinds and turning off unnecessary lights. This will enhance the contrast and sharpness of the projected image, resulting in a clearer picture.
By following these troubleshooting steps, you can resolve the issue of a blurry image on your DR. J Projector. Remember to adjust the keystone and focus ring, check for max screen size limitations, and create a dark environment for optimal viewing. Enjoy crisp and vibrant visuals on your projector!

| Troubleshooting Steps | Description |
|---|---|
| Adjust the Keystone and Focus Ring | Experiment with the keystone and focus ring settings to achieve a clear and focused image. |
| Check for Max Screen Size Limitations | Ensure that your screen size is within the recommended range to avoid blurriness. |
| Create a Dark Environment for Better Viewing | Minimize ambient light to enhance contrast and sharpness for a clearer image. |
How to Play Video in Full-Screen Mode on DR. J Projector – Step-by-Step Tutorial
Playing videos in full-screen mode on your DR. J Projector can enhance your viewing experience and provide a more immersive cinematic feel. Follow these step-by-step instructions to enjoy your favorite movies and videos in full-screen:
- Connect your DR. J Projector to the desired input source, such as a laptop or DVD player, using the appropriate cables.
- Ensure that the video file you want to play is compatible with the projector. Supported video formats may include MP4, AVI, MKV, or MOV.
- Insert a USB flash drive containing the video file into the USB port on the projector.
- Use the projector’s remote control or onboard controls to navigate to the “Media” or “Video” option in the menu.
- Select the USB flash drive as the source for your video playback.
- Browse through the files on the USB flash drive and locate the video file you want to play.
- Highlight the video file and press the “Play” button on the remote control or the projector.
- Once the video starts playing, press the “Full-Screen” button on the remote control or the projector’s onboard controls.
- Enjoy your video in full-screen mode, with a larger and more immersive viewing experience.
By following these simple steps, you can easily play videos in full-screen mode on your DR. J Projector. Whether you’re watching movies, TV shows, or streaming videos, the full-screen mode allows you to enjoy a more engaging and cinematic experience right at home.
Conclusion
In conclusion, setting up the DR. J Projector is a simple and rewarding process. By following the step-by-step guide provided in this article, you can easily install and configure your projector for optimal performance. Whether you’re a first-time user or a seasoned projector enthusiast, these instructions will ensure a smooth and successful setup.
Additionally, the troubleshooting tips discussed in this article offer solutions to common issues that may arise during the setup process. From HDMI connectivity problems to sound and image quality issues, you can now tackle these challenges with confidence.
By taking advantage of the DR. J Projector’s advanced features and functionalities, you can elevate your viewing experience to new heights. Whether you’re enjoying movies, gaming, or giving presentations, this projector provides excellent performance and value for money.
With the step-by-step instructions, troubleshooting tips, and additional information provided in this article, you now have the necessary knowledge to make the most of your DR. J Projector. Experience superior image quality, immersive sound, and seamless connectivity by following the guidelines outlined here. Enjoy your new projector and all the entertainment it brings!
FAQs
1. How Do I Set Up The Dr J Projector?
To set up the Dr J Projector, follow these steps: place the projector on a flat surface, adjust the distance and screen size, connect to power, calibrate the keystone and focus knobs, and connect external devices for additional resources.
2. What Should I Do If The HDMI On My DR. J Projector Is Not Working?
If you’re experiencing HDMI connectivity issues with your DR. J Projector, try these troubleshooting solutions: check the input source, adjust Dolby Digital Plus settings, verify HDCP compatibility, and test the HDMI cable.
3. How Can I Connect My Phone To The DR. J Projector?
To connect your phone to the DR. J Projector, follow these troubleshooting tips: use the appropriate adapters for Android or iPhone, ensure you trust the projector on your phone, and follow the proper connection process.
4. What Should I Do If There Is No Sound Coming From My DR. J Projector?
If you can see the projection image but can’t hear any sound from your DR. J Projector, try these troubleshooting steps: check video format compatibility, adjust audio settings for streaming platforms, test audio connections, ensure the projector is not muted, and verify the earphone connection.
5. How Can I Fix A Black Spot On The Projection Image Of My DR. J Projector?
If you notice a black spot on the projection image of your DR. J Projector, try these solutions: clean the lens, remove any sundries on vents, check for overheating issues, and seek professional assistance if necessary.
6. What Should I Do If My DR. J Projector Is Overheating?
If your DR. J Projector is experiencing overheating issues, try these troubleshooting tips: Check the fan and vents for blockages, ensure proper ventilation and cooling, schedule breaks for the projector, and avoid placing it near heat-producing devices.
7. How Do I Update The Software Of My DR. J Projector?
To update the software of your DR. J Projector, you can use the automatic software update feature or perform a manual update. If you need further assistance or the latest software, contact customer service.
8. How Do I Set Up A DR. J Projector For The First Time?
If you’re new to setting up a DR. J Projector, follow this comprehensive setup guide: place the projector on a flat surface, adjust the distance and screen size, connect to power, calibrate the keystone and focus knobs, and connect external devices for additional resources.
9. How Can I Adjust The Image Size On My DR. J Projector?
To adjust the image size on your DR. J Projector, follow these tips: make the image bigger or smaller by adjusting the projector’s distance from the screen or wall to achieve the optimal viewing experience.
10. What Should I Do If The Image On My DR. J Projector Is Blurry?
If you’re experiencing a blurry image on your DR. J Projector, try these troubleshooting steps: adjust the keystone and focus ring, check for max screen size limitations, create a dark environment for better viewing, and consider software updates if necessary.
11. How Do I Play Videos In Full-Screen Mode On My DR. J Projector?
To play videos in full-screen mode on your DR. J Projector, follow these steps: select the input source, locate and play videos from a USB flash drive, and enable full-screen mode for an immersive viewing experience.