Looking to enhance your home theater setup? Connecting your cable box to a projector is a fantastic way to enjoy your favorite movies and TV shows on a larger screen. In this step-by-step guide, we’ll walk you through the process of the cable box to projector connection, ensuring you have all the information you need to set up your cable box and projector for the ultimate viewing experience.
From gathering the necessary materials and selecting the right input cables to connecting the devices and fine-tuning the settings, we’ve got you covered. Say goodbye to small screens and hello to immersive entertainment!
So, if you’re ready to learn how to hook up your cable box to a projector, let’s dive in and get started with the cable box projector connection guide. Whether you’re a tech-savvy enthusiast or a beginner, this guide will walk you through the process in a simple and straightforward manner.
Materials Needed for Connecting Cable Box to Projector
Before you can connect your cable box to a projector, it’s important to gather all the necessary materials. Here’s a list of what you’ll need:
- A cable box: This is the device that receives and decodes the cable television signal.
- A projector: Choose a projector that meets your desired specifications, such as resolution and brightness.
- Input cables: The type of input cables you’ll need depends on the ports available on your cable box and projector. Most modern devices use HDMI cables for video and audio signals.
Make sure to have these materials ready before proceeding with the setup process.
Gathering the Materials
When selecting a cable box, consider one that is compatible with your cable television service provider and offers the features you desire, such as DVR functionality or access to streaming apps. As for the projector, choose a model that suits your needs in terms of resolution, brightness, and connectivity options. It’s important to have the appropriate input cables, such as HDMI cables, as they provide high-quality audio and video transmission.
Considerations for Cable Box and Projector
Ensure that your cable box and projector have compatible ports for connecting them. Check the available ports on both devices and ensure they match. For example, if both devices have HDMI ports, you’ll need an HDMI cable for the connection. It’s also a good idea to check the cable length to ensure it reaches the cable box to the projector without any issues. Having the right materials will help you achieve a seamless and high-quality connection.
| Materials Needed | Description |
|---|---|
| Cable box | Receives and decodes the cable television signal |
| Projector | Displays the video signal on a larger screen |
| Input cables (e.g., HDMI) | Transmit video and audio signals between the cable box and projector |
Placement of the Projector and Cable Box
When setting up your projector and cable box, it is important to carefully consider their placement. The positioning of these devices can greatly impact your viewing experience. Here are a few key points to keep in mind:
Projector Placement:
- Find a suitable location for the projector that allows for a clear line of sight to the projection surface. This can be a blank wall or a projector screen.
- Ensure that the projector is positioned at an appropriate distance from the projection surface to achieve the desired screen size and image quality.
- Take into account any environmental factors such as ambient light or room reflections that may affect the image clarity. Consider using blackout curtains or dimming the room for optimal viewing conditions.
Cable Box Placement:
- Place the cable box in a convenient and accessible location near the projector. This will make it easier to connect the devices and access the cable box for any necessary adjustments.
- Ensure that the cable box has proper ventilation and is not obstructed by other objects. This will prevent overheating and prolong the lifespan of the device.
By taking the time to carefully consider the placement of your projector and cable box, you can create a comfortable and immersive viewing environment. Remember to test different positions and angles to find the setup that works best for your specific space.

| Device | Considerations |
|---|---|
| Projector | A clear line of sight to the projection surface Appropriate distance for desired screen size Account for ambient light and reflections |
| Cable Box | Convenient and accessible location Proper ventilation Avoid obstructions |
Selecting the Input Cables for Connection
When connecting your cable box to a projector, it’s crucial to select the right input cables for a seamless and high-quality connection. Depending on the devices you have, you may need different types of cables to transmit both video and audio signals.
The most common and widely used input cable for modern devices is the HDMI cable. HDMI cables are capable of transmitting high-definition video and immersive audio signals, making them an ideal choice for connecting your cable box to the projector.
Before you start connecting the cables, ensure that you have the right HDMI cable that is compatible with both your cable box and projector. It’s recommended to use a high-quality HDMI cable to ensure optimal video and audio transmission. You can find HDMI cables in various lengths to suit your specific setup requirements.
Types of Input Cables:
- HDMI Cable: HDMI cables are commonly used for transmitting video and audio signals between devices. They offer high-definition picture quality and immersive sound, making them ideal for connecting your cable box to the projector.
- VGA Cable: VGA cables are an older type of video cable that can be used to connect devices that do not have HDMI ports. However, VGA cables transmit video signals only and do not carry audio signals. Therefore, if you choose to use a VGA cable, you will need an additional audio cable for audio transmission.
- Component Cable: Component cables were once a popular choice for connecting video devices. They consist of three separate cables for transmitting video signals. However, like VGA cables, component cables do not carry audio signals, so you will need separate audio cables for audio transmission.
When selecting your input cables, it’s important to consider the compatibility of your devices and the desired video and audio quality. HDMI cables are generally the best choice for connecting your cable box to a projector, as they provide both high-definition video and audio signals in a single cable.
| Cable Type | Video Signal | Audio Signal |
|---|---|---|
| HDMI | High-Definition | Yes |
| VGA | Standard Definition | No |
| Component | Standard Definition | No |
Connecting the Cable Box to the Projector
Now that you have gathered all the necessary materials and selected the appropriate input cables, it’s time to connect your cable box to the projector. Follow these simple steps:
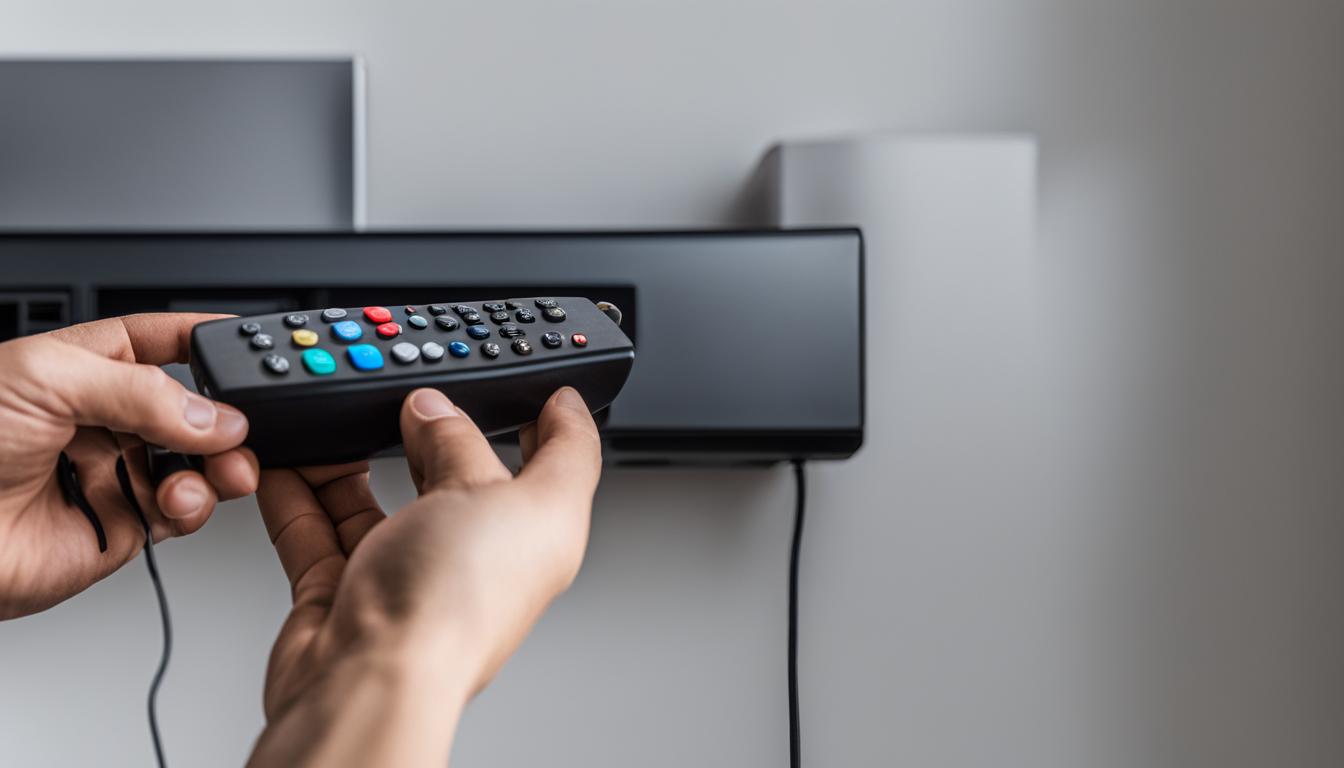
- Step 1: Locate the HDMI ports on both the cable box and the projector. The HDMI port on the cable box is usually labeled “HDMI Out” or “Output,” while the HDMI port on the projector is labeled “HDMI In” or “Input.”
- Step 2: Take one end of the HDMI cable and insert it into the HDMI output port of the cable box. Make sure to align the shape of the HDMI connector with the port, and gently push it in until it’s securely connected.
- Step 3: Take the other end of the HDMI cable and insert it into the HDMI input port of the projector. Again, align the connector with the port and gently push it in until it’s securely connected.
- Step 4: Once the HDMI cable is properly connected to both devices, you should see the cable box’s video signal displayed on the projector. If not, refer to the projector’s manual to select the correct input source or use the projector remote control to cycle through the available input options until the cable box signal is detected.
That’s it! You have successfully connected your cable box to the projector using an HDMI connection. Now you can enjoy your favorite movies, TV shows, and other content on a larger screen for a more immersive viewing experience.
| HDMI Connection | Video Input | Audio Input |
|---|---|---|
| HDMI cable | HDMI input port on the projector | None (audio is usually transmitted through the HDMI cable) |
Ensure you are using a high-quality HDMI cable for the best video and audio transmission. A poor-quality cable can result in signal loss or degradation. Additionally, check that the HDMI cable length is suitable for your setup to avoid any limitations or issues.
Now that your cable box is successfully connected to the projector, you can proceed to the next section to learn how to power the devices and adjust the necessary settings for optimal viewing.
Powering on the Projector and Cable Box
Now that you have successfully connected the cable box to the projector, it’s time to power both devices and ensure a smooth boot-up process. This step is crucial to establishing the connection between the projector and the cable box.
To start, locate the power buttons on both the projector and cable box. Press the power button on the cable box to turn it on. Give it a few seconds to initialize and establish a connection with the projector.
Next, press the power button on the projector to turn it on. Allow the projector to go through its boot-up process. Depending on the model, it may take a few seconds or a couple of minutes for the projector to fully power up.
During the boot-up process, the projector should automatically detect the connection from the cable box. However, if it doesn’t, don’t worry. You can manually select the appropriate input option on the projector. Use either the provided remote control or the physical control buttons on the projector to navigate to the input settings and select the corresponding input signal for the cable box.
Checking the Video Input Signal
Once you have successfully connected your cable box to the projector, it is important to check the video input signal to ensure that everything is working correctly. Follow these steps to verify the video input:
- Locate the input button on your projector or its remote control.
- Press the input button until the projector displays the image or indicates the input cable channel.
- Make sure that the input selected corresponds to the HDMI port you connected the cable box to.
This step is crucial because it ensures that the projector recognizes and picks up the video signal from the cable box. By checking the video input signal, you can be confident that you are ready to enjoy your favorite shows and movies on the big screen.
Now that you have successfully checked the video input signal, you are one step closer to experiencing a cinematic viewing experience from the comfort of your own home. Next, we will explore how to connect a sound source to enhance your audio output.
Troubleshooting the Video Input Signal
| Issue | Solution |
|---|---|
| No image displayed on the projector | Check the HDMI connections and make sure they are secure. Ensure that the input selected on the projector matches the HDMI port used for the cable box. |
| Distorted or flickering image | Try using a different HDMI cable to rule out any potential cable issues. Adjust the projector settings for resolution and refresh rate if necessary. |
| No signal or weak signal | Make sure the cable box is powered on and transmitting a signal. Try reconnecting the HDMI cable or using a different HDMI port on the projector. |

Refer to the table above for troubleshooting common issues with the video input signal. By following the suggested solutions, you can resolve any potential problems and ensure a smooth and uninterrupted viewing experience.
Connecting a Sound Source
When setting up your cable box to a projector, you may find that the projector’s built-in speakers do not provide the desired sound quality. In this case, it’s recommended to connect a sound source such as a surround sound system or external speakers. This will enhance your audio experience and make your home theater setup truly immersive.
To connect a sound source, you will need audio cables. Start by unplugging the red and white audio cables from the projector. Then, plug these cables into the corresponding audio input slots of your external sound source. Make sure to match the color coding (red to red, white to white) for proper audio channeling.
Once the sound source is connected, adjust the sound settings on both the cable box and the sound source. This will ensure optimal audio output. You can adjust parameters such as volume, bass, treble, and surround sound effects to suit your preferences.
Choosing the Right Sound System
When selecting a sound source, consider the size of your room and the desired audio quality. A surround sound system with multiple speakers can create a more immersive and cinematic experience. On the other hand, if you prefer a simpler setup, a pair of high-quality external speakers can still provide enhanced sound.
Keep in mind that the placement of speakers is important for optimal sound distribution. Experiment with different speaker positions to find the setup that delivers the best audio performance, considering factors like speaker size, room acoustics, and seating arrangement.
Summing Up
Connecting a sound source to your cable box and projector setup is a crucial step for achieving excellent audio quality. By following the steps outlined above and selecting the right sound system for your needs, you can enjoy a truly cinematic experience in the comfort of your home.
| Benefits of Connecting a Sound Source | Considerations when Choosing a Sound System |
|---|---|
|
|
Tips for an Optimal Cable Box and Projector Setup
Setting up your cable box and projector properly is essential to ensure a seamless and immersive viewing experience. Follow these tips to optimize your setup:
Use a High-Quality HDMI Cable
Investing in a high-quality HDMI cable is crucial for achieving superior video and audio transmission. A high-quality cable will minimize signal loss and interference, resulting in a clearer and more vibrant image on your projector. Look for cables that are labeled as “high-speed” or “premium” for the best performance.
Choose the Right-Length HDMI Cable
When selecting an HDMI cable, make sure it is the right length for your setup. Avoid using excessively long cables as they may cause signal degradation. Conversely, using a cable that is too short can restrict your flexibility in projector placement. Measure the distance between your cable box and projector and choose a cable length accordingly.
Consider Using External Speakers
While projectors often come with built-in speakers, they may not provide the best audio quality. To enhance your viewing experience, consider connecting external speakers or a surround sound system to your cable box. This will deliver rich and immersive audio, making you feel like you’re in a true home theater.
Utilize a Projector Screen
For optimal display quality, use a dedicated projector screen instead of projecting onto a plain wall. A projector screen is designed to enhance image clarity and brightness, providing a more enjoyable viewing experience. It also helps prevent any distortions or color variations that may occur when projecting onto uneven surfaces.
Create a Dim Environment
To fully appreciate the vibrant colors and contrast of your projector, create a dim environment by turning off ambient lights and closing curtains or blinds. This will reduce any unwanted glare or reflections on the screen, allowing you to fully immerse yourself in the cinematic experience.
| Tip | Description |
|---|---|
| Use a High-Quality HDMI Cable | Invest in a high-speed or premium HDMI cable to ensure superior video and audio transmission. |
| Choose the Right-Length HDMI Cable | Select an HDMI cable that is the appropriate length for your cable box and projector setup. |
| Consider Using External Speakers | Connect external speakers or a surround sound system for enhanced audio quality. |
| Utilize a Projector Screen | Opt for a projector screen to improve image clarity and display quality. |
| Create a Dim Environment | Dim the lights and reduce ambient light to minimize screen glare and enhance the viewing experience. |
Safety Measures and Maintenance
When setting up your cable box and projector, it’s important to prioritize safety and ensure proper maintenance. By following a few simple guidelines, you can enjoy your home theater experience without any hazards or issues.
Projector Safety
First and foremost, make sure your projector is securely mounted. This will prevent any accidental falls or damage. Additionally, take care when handling the projector to avoid dropping or mishandling it. Remember, projectors are delicate devices that require gentle treatment.
Cable Management
To minimize tripping hazards and maintain a neat setup, consider implementing effective cable management. Use cable ties or cord covers to keep the cables organized and out of the way. This will not only improve the aesthetic of your home theater but also ensure the safety of everyone in the room.
Bulb Lifespan
Be mindful of the projector bulb’s lifespan. Prolonged use can shorten its life and result in reduced brightness or complete failure. Avoid leaving the projector on for extended periods when not in use. This will help extend the lifespan of the bulb and save on replacement costs in the long run.
| Tip | Description |
|---|---|
| Secure Mounting | Make sure the projector is securely mounted to prevent accidents or damage. |
| Cable Management | Use cable ties or cord covers to organize and manage the cables for a clean setup. |
| Mindful Usage | Avoid leaving the projector on for extended periods when not in use to prolong the bulb’s lifespan. |
By implementing these safety measures and proper maintenance, you can enjoy a worry-free and long-lasting cable box and projector setup. Stay safe and make the most of your home theater experience!
Conclusion
Connecting a cable box to a projector is a straightforward process that can enhance your home theater setup. By following the step-by-step guide outlined in this article, you can enjoy an immersive viewing experience with a larger screen. Whether you’re watching your favorite movies or catching up on TV shows, the combination of a cable box and projector offers a cinematic feel in the comfort of your own home.
Remember to gather all the necessary materials, including the cable box, projector, and appropriate input cables, before starting the setup. Consider the placement of the projector and cable box to ensure convenient access. Use HDMI cables for optimal video and audio transmission, and don’t forget to power on both devices and select the correct input option on the projector.
To further enhance your setup, you can connect a sound source such as a surround sound system or external speakers. Consider using a projector screen for optimal display quality and create a dim environment to enhance the projection quality. Additionally, be mindful of safety measures, such as securely mounting the projector and managing the cables to prevent tripping hazards.
With these steps and tips in mind, you’re well on your way to creating a home theater setup that will transform your entertainment experience. So grab your popcorn, sit back, and enjoy the immersive world of movies and TV shows on the big screen.
FAQS
1. What Materials Do I Need To Connect A Cable Box To A Projector?
You will need a cable box, a projector, and the appropriate input cables.
2. Where Should I Place The Projector And Cable Box?
Choose a desired location for the projector and ensure the cable box is easily accessible.
3. What Type Of Input Cables Should I Use?
Most modern devices use HDMI cables for both video and audio signals.
4. How Do I Connect The Cable Box To The Projector?
Use an HDMI cable to connect the HDMI output port of the cable box to the HDMI input port of the projector.
5. How Do I Power On The Projector And Cable Box?
Power on both devices and allow them to go through their boot-up process.
6. How Do I Check The Video Input Signal On The Projector?
Press the input button on the projector or its remote until the image displays or indicates the input cable channel.
7. Can I Connect A Sound Source To The Projector For Better Audio?
Yes, you can connect a sound source such as a surround sound system or speakers using audio cables.
8. What Tips Do You Have For An Optimal Cable Box And Projector Setup?
Use a high-quality HDMI cable, ensure the cable length is suitable for your setup, consider using external speakers, use a projector screen, and create a dim environment for better projection quality.
9. What Safety Measures Should I Consider When Setting Up The Projector And Cable Box?
Make sure the projector is securely mounted and the cables are managed to prevent tripping hazards. Handle the projector with care and consider the lifespan of the bulb.