Welcome to our step-by-step guide on how to bypass Dell Automatic Repair. If you’re experiencing issues with your Dell computer, such as the Automatic Repair loop or Dell Automatic Repair not working, this guide is here to help. We’ll walk you through various methods and solutions to bypass Dell Automatic Repair and get your computer up and running again.
Whether you’re looking for Dell repair bypass methods, troubleshooting tips, or Dell repair bypass solutions, we’ve got you covered. Our guide will provide you with detailed instructions and insights to skip Dell Automatic Repair and overcome any issues you may encounter.
So, let’s dive in and find out how to bypass Dell Automatic Repair and get your Dell computer back on track!
What is Dell Automatic Repair, and Why Does It Occur?
Dell Automatic Repair is a built-in feature in Windows that aims to fix issues preventing the computer from booting properly. When a Dell computer encounters boot problems or encounters errors during the startup process, the Automatic Repair feature is triggered. It attempts to diagnose and resolve these issues automatically, allowing the computer to start up normally.
However, there are situations where Dell Automatic Repair can get stuck in a loop and fail to fix the problem effectively. This can result in the computer repeatedly attempting to repair itself without success, leading to frustration for users.
Dell Automatic Repair may occur due to various reasons, including software glitches, corrupt system files, incompatible drivers, or hardware failures. Common scenarios that trigger Automatic Repair include sudden power outages, improper shutdowns, failed Windows updates, and operating system crashes. Additionally, issues with the boot configuration or problematic startup settings can also lead to the activation of Dell Automatic Repair.
| Common Causes of Dell Automatic Repair |
|---|
| Corrupt system files |
| Incompatible or outdated drivers |
| Hardware failures |
| Failed Windows updates |
| Improper shutdowns or sudden power outages |
Understanding the causes and scenarios of Dell Automatic Repair is crucial for troubleshooting and resolving the issue effectively. In the following sections, we will explore different methods and solutions to bypass Dell Automatic Repair, allowing you to regain control and successfully boot your Dell computer.
Running Windows Startup Repair
If you are experiencing issues with your Dell computer not booting properly, Windows Startup Repair can be a helpful tool to resolve the problem. This feature is designed to troubleshoot and fix common boot issues such as corrupt system files, boot configuration data errors, and hardware errors. Follow the steps below to run Windows Startup Repair on your Dell computer:
- Start by restarting your computer and continuously pressing the F8 key as it boots up.
- This will bring up the Advanced Boot Options menu. Select “Repair Your Computer” and press Enter.
- In the next screen, select the operating system you want to repair and click “Next.”
- On the System Recovery Options screen, choose “Startup Repair.” Windows will then attempt to diagnose and fix any boot issues.
- Once the repair process is complete, you will be prompted to restart your computer. Remove any installation media, such as a Windows installation disk, before restarting.
Running Windows Startup Repair can help resolve many common boot issues on Dell computers. However, if the problem persists after running the repair tool, you may need to explore other troubleshooting options or seek professional assistance to identify and fix any underlying hardware problems.
Note: It is always recommended to back up your important data before attempting any repairs or modifications to your computer’s system.
| Common Issues Addressed by Windows Startup Repair | Possible Solutions |
|---|---|
| Corrupt system files | Windows Startup Repair attempts to repair and replace any corrupt files that may be causing boot issues. |
| Boot configuration data errors | The repair tool can fix errors in the boot configuration data, which helps the computer start up properly. |
| Hardware errors | Windows Startup Repair can identify and troubleshoot certain hardware errors that may be preventing the computer from booting. |
By following the steps outlined above and using Windows Startup Repair, you can effectively troubleshoot and fix various boot issues on your Dell computer. Remember to always back up your data regularly and seek professional assistance if the problem persists or if you are uncertain about performing any repairs yourself.
Initiating Startup Repair from the Settings App
If you’re experiencing issues with your Dell computer and need to initiate Startup Repair, you can easily do so through the Settings app. Follow the steps below to access the Troubleshoot menu and Advanced Options, where you can find the Startup Repair option.
Accessing the Troubleshoot menu
- Click on the Start menu and select the Settings icon (looks like a gear).
- In the Settings window, click on the “Update & Security” option.
- In the left sidebar, select the “Recovery” tab.
- Under the “Advanced startup” section, click on the “Restart now” button. Your computer will restart and bring up the Troubleshoot menu.
Accessing Advanced Options and initiating Startup Repair
- After restarting, you will see the Troubleshoot menu.
- Click on the “Advanced options” button.
- In the Advanced Options menu, select the “Startup Repair” option.
- Follow the on-screen instructions to start the Startup Repair process and let it diagnose and fix any issues with your Dell computer.
By following these steps, you can easily initiate Startup Repair from the Settings app on your Dell computer. If you’re experiencing boot issues or other problems with your system, Startup Repair can help diagnose and resolve them, getting your computer back up and running smoothly.

Starting Startup Repair: Troubleshooting Dell Boot Issues
When faced with boot issues on your Dell computer, initiating Startup Repair can often be a helpful solution. This section will guide you through the process of starting Startup Repair from the desktop or lock screen, providing troubleshooting options to resolve Dell boot issues.
Troubleshooting Dell Boot Issues
To access the Windows boot troubleshooting menu, follow these steps:
- On the desktop or lock screen, press and hold the Shift key while selecting the Restart option.
- In the Windows boot troubleshooting menu, select Troubleshoot.
- Choose the desired troubleshooting option based on your specific issue. For Dell boot issues, select Startup Repair.
Dell Repair Command Prompt
If Startup Repair is unable to resolve the issue, you can also access the Dell Repair Command Prompt. Here’s how:
- Follow Steps 1 and 2 from the previous section to access the Windows boot troubleshooting menu.
- Select Command Prompt.
- Once in the Command Prompt, you can use various commands to troubleshoot and fix boot issues on your Dell computer.
By following these steps, you can efficiently initiate Startup Repair and access further troubleshooting options, including the Dell Repair Command Prompt. These tools will help you troubleshoot and resolve Dell boot issues, allowing you to get your computer up and running smoothly.
Initiating Startup Repair using a Windows Installation Disk
If your Dell computer is unbootable and cannot access the Windows Recovery Environment (WinRE), you can still initiate Startup Repair using a Windows installation disk. This method allows you to repair the system and resolve the Dell Automatic Repair loop. Here’s how you can do it:
- Create a Windows installation disk using the Dell OS Recovery tool. This tool is specifically designed for Dell computers and ensures compatibility with your system.
- Once you have the installation disk ready, insert it into the computer and restart.
- During the boot process, press the appropriate key (usually F12) to access the One Time Boot menu.
- In the One Time Boot menu, select the option to boot from the Windows installation disk.
- Follow the on-screen prompts to choose your language preferences and click “Next.”
- Click on “Repair your computer” and select “Troubleshoot.”
- In the Troubleshoot menu, click on “Advanced options.”
- From the Advanced Options menu, select “Startup Repair” to initiate the repair process.
By using a Windows installation disk, you can bypass the Dell Automatic Repair loop and potentially fix the boot issues on your Dell computer. It’s important to note that this method may require some technical knowledge and is recommended for advanced users. If you’re unsure or uncomfortable with these steps, it’s best to seek assistance from a professional or contact Dell support for further guidance.
How to Fix Dell Automatic Repair Loop
If you’re experiencing the frustrating Dell Automatic Repair loop, there are several methods you can try to resolve the issue and get your computer booting properly again. Here are some solutions to consider:
1. Running System Repair Tools
One of the first steps you can take is to run system repair tools to fix any corrupted system files that may be causing the Automatic Repair loop. This can be done through the Windows Recovery Environment or by using a Windows installation disk. These tools will scan and restore any missing or damaged system files, helping to resolve booting issues.
2. Performing a System Scan in Safe Mode
If the Automatic Repair loop persists, you can try booting your Dell computer into Safe Mode and performing a system scan. Safe Mode starts your computer with only the essential drivers and services, which can help identify and fix any software conflicts or malware that may be causing the issue. To access Safe Mode, restart your computer and repeatedly press the F8 key until the Advanced Boot Options menu appears.
3. Restoring the Windows Registry
In some cases, the Automatic Repair loop may be caused by a corrupted Windows registry. To fix this, you can restore the Windows registry to a previous working state. Access the Windows Recovery Environment or use a Windows installation disk, and choose the option to restore the system to an earlier point in time. This will revert the registry back to a previous state before the issue occurred.
4. Disabling Certain Features
In rare cases, certain features or settings on your Dell computer may be triggering the Automatic Repair loop. To troubleshoot this, you can try disabling features like Secure Boot or Fast Startup. These options can usually be found in the BIOS or UEFI settings of your computer. Disabling these features may help bypass the Automatic Repair loop and allow your computer to boot normally.
By following these methods, you can effectively troubleshoot and fix the Dell Automatic Repair loop issue, restoring your computer’s functionality and preventing any further booting problems.
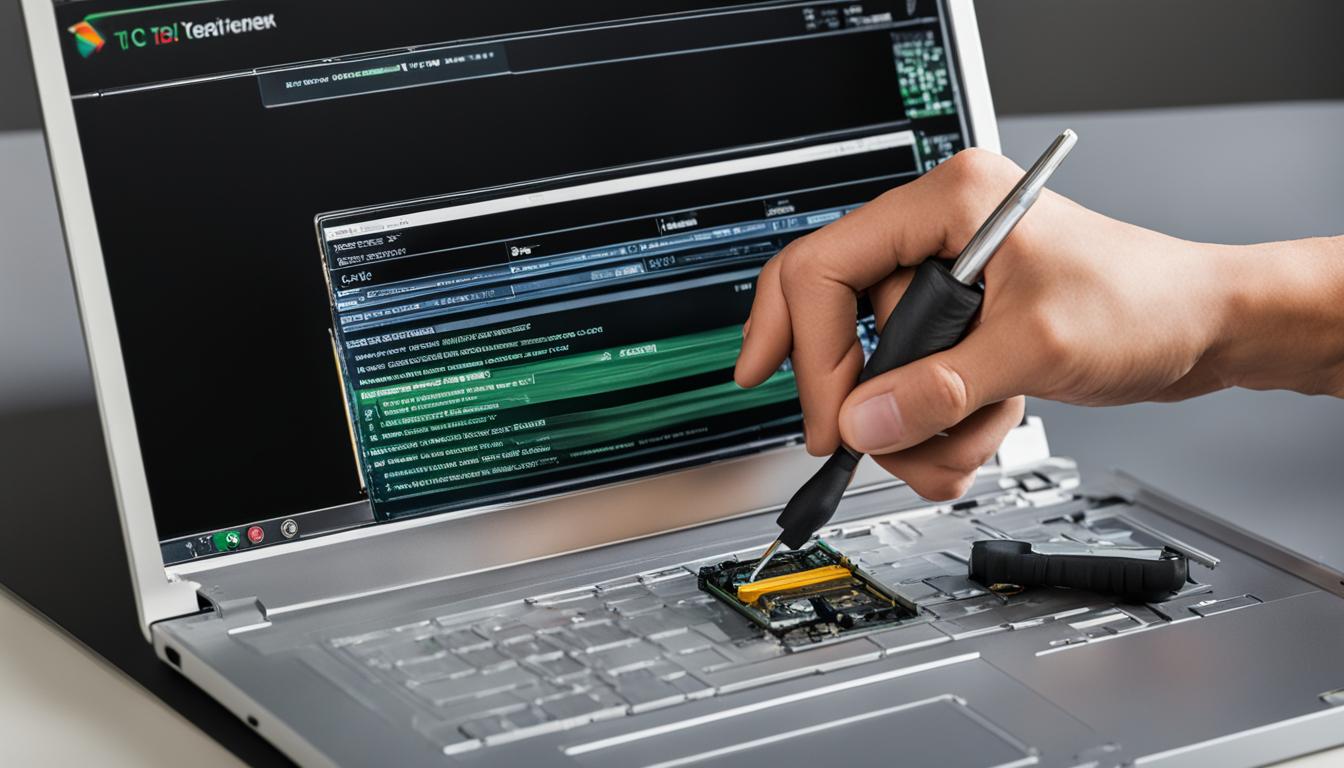
Dealing with Hardware Failures and Clean Install
In some cases, the Dell Automatic Repair loop may persist despite attempting various solutions. This could indicate underlying hardware failures. It’s important to diagnose hardware issues accurately to identify and replace any faulty components.
To diagnose hardware issues, you can start by checking the system’s event logs for any error messages related to hardware. Additionally, running a hardware diagnostics test provided by Dell can help pinpoint the specific hardware component causing the problem.
If a faulty component is identified, it will need to be replaced. Dell provides detailed guides and resources on their support website to assist with hardware replacement. It is recommended to follow these guides carefully or seek professional assistance to ensure proper installation.
If all else fails, a clean installation of Windows can be considered as a last resort. This involves formatting the hard drive and reinstalling the operating system from scratch. Keep in mind that a clean installation will delete all data on the hard drive, so it’s crucial to back up important files beforehand.
Performing a clean installation of Windows can be done using a Windows installation disk or a bootable USB drive. Dell provides instructions on how to create a bootable USB drive using the Dell OS Recovery tool. Once the installation media is ready, follow the on-screen prompts to format the hard drive and install a fresh copy of Windows.
After the clean installation, it’s important to reinstall all necessary drivers, applications, and updates to ensure the system is functioning optimally. Be sure to keep the system up to date with the latest security patches and driver updates from Dell’s support website.
Remember, dealing with hardware failures and performing a clean installation of Windows should only be done as a last resort when all other troubleshooting methods have been exhausted. It’s always recommended to seek professional assistance if you’re unsure or uncomfortable with performing these steps on your own.
Backing Up Data and Preventive Measures
When dealing with Dell Automatic Repair issues, it’s crucial to prioritize data backup to prevent any potential loss. Taking proactive measures and implementing regular maintenance can also help avoid future complications. Here are some key steps to consider:
- Perform regular data backups: It’s essential to create backups of important files and documents. Use Windows backup options, such as File History or Backup and Restore, to safeguard your data. Consider using external storage devices or cloud-based services for added protection.
- Maintain system health: Performing routine system maintenance can prevent issues that may trigger Dell Automatic Repair. Keep your operating system updated with the latest security patches and software updates. Regularly scan your system for malware and remove any potential threats.
- Optimize startup programs: Disable unnecessary startup programs to improve system performance and minimize the chances of encountering boot-related issues. You can access the Task Manager and navigate to the Startup tab to manage these programs.
Preventive Measures Table
| Preventive Measure | Description |
|---|---|
| Regular System Maintenance | Perform routine scans, update software, and remove unnecessary files to keep your system running smoothly. |
| Backup Critical Data | Create backups of important files on external storage or cloud-based services to avoid data loss in case of unexpected issues. |
| Update Operating System | Keep your operating system up to date with the latest security patches and software updates to avoid vulnerabilities. |
| Minimize Startup Programs | Disable unnecessary programs that launch during startup to optimize system performance and prevent boot-related issues. |
| Use Reliable Antivirus Software | Install and regularly update antivirus software to protect your system from malware and other security threats. |
By following these preventive measures, you can minimize the risk of encountering Dell Automatic Repair issues and maintain the stability of your Dell computer. Remember to create regular backups, perform system maintenance, and stay updated with the latest software releases to ensure a smooth computing experience.
Recommended Articles and Resources
Looking for more information on Dell Automatic Repair and troubleshooting? Check out these recommended articles and resources:
1. Dell Support
If you’re experiencing issues with your Dell computer or need assistance with Dell Automatic Repair, visit the official Dell Support website. You’ll find a wealth of information, FAQs, and resources to help resolve your problems.
2. Out of Warranty Support
Is your Dell computer out of warranty? Don’t worry, Dell offers out-of-warranty support options. They have dedicated support technicians who can assist you with troubleshooting and finding solutions for your Dell Automatic Repair issues.
3. Dell Offers
Keep an eye on Dell’s official website for any special offers or promotions related to Dell Automatic Repair. They often have exclusive deals on Dell computer repairs, software, and accessories that can help you save money while getting your Dell computer back in working condition.
4. Related Articles
For additional reading on Dell Automatic Repair and related topics, explore these informative articles:
- “Troubleshooting Dell Boot Issues: A Comprehensive Guide”
- “Common Dell Repair Problems and How to Solve Them”
- “Preventing Dell Automatic Repair Loop: Best Practices”
5. Dell Service Tag
When seeking support from Dell, it’s helpful to have your Dell service tag handy. This unique identifier can assist Dell technicians in understanding your specific computer model and configuration, enabling them to provide more accurate and personalized support.
| Resource | Description |
|---|---|
| Dell Support | Official Dell support website for assistance with Dell Automatic Repair |
| Out of Warranty Support | Dedicated support for Dell computers that are out of warranty |
| Dell Offers | Special deals and promotions on Dell computer repairs and accessories |
| Related Articles | Informative articles on Dell Automatic Repair and related topics |
| Dell Service Tag | Unique identifier for accurate and personalized support from Dell |

Conclusion
In conclusion, troubleshooting Dell repairs and bypassing Dell Automatic Repair can be a daunting task, but with the right methods and solutions, it is possible to overcome the Automatic Repair loop. By running Windows Startup Repair and initiating it from various options such as the Settings app, desktop, or lock screen, users can attempt to fix common boot issues and repair corrupt system files. If these methods fail, using a Windows installation disk can provide an alternative solution.
However, it’s important to note that if the Dell Automatic Repair loop persists, it may indicate underlying hardware failures. In such cases, diagnosing hardware issues and potentially performing a clean installation of Windows may be necessary. It’s crucial to back up important data before attempting any repair steps and to consistently maintain the system through regular updates and maintenance to prevent future issues.
For further assistance and information, Dell support options and related articles are available. Troubleshooting Dell repairs can be a challenging task, but with the right tools and knowledge, users can overcome Dell Automatic Repair issues and ensure a smooth computing experience.
FAQ
1. What Is Dell Automatic Repair And Why Does It Occur?
Dell Automatic Repair is a built-in feature in Windows that attempts to fix issues preventing the computer from booting properly. It can occur when there are problems with the boot configuration data, corrupt system files, or hardware errors.
2. How Do I Run Windows Startup Repair On My Dell Computer?
You can run Windows Startup Repair on your Dell computer by accessing the Troubleshoot menu and Advanced Options from the Settings app or by using the Windows boot troubleshooting menu on the desktop or lock screen. If the computer cannot boot into the Windows Recovery Environment (WinRE), you can use a Windows installation disk to initiate Startup Repair.
3. How Do I Initiate Startup Repair From The Settings App On My Dell Computer?
To initiate Startup Repair from the Settings app on your Dell computer, follow these steps:
1. Open the Settings app.
2. Click on “Update & Security.”
3. Select “Recovery” from the left sidebar.
4. Under the “Advanced startup” section, click on “Restart now.”
5. When the computer restarts, select “Troubleshoot” from the menu.
6. Click on “Advanced options” and then choose “Startup Repair.”
4. How Do I Initiate Startup Repair From The Desktop Or Lock Screen On My Dell Computer?
To initiate Startup Repair from the desktop or lock screen on your Dell computer, follow these steps:
1. Press the power button to turn on the computer.
2. Immediately press and hold the Shift key.
3. While holding Shift, click on “Restart” in the Start menu or on the lock screen.
4. The computer will restart and display the Windows boot troubleshooting menu.
5. Select “Troubleshoot” and then choose “Advanced options.”
6. Click on “Startup Repair.”
5. How Do I Initiate Startup Repair Using A Windows Installation Disk On My Dell Computer?
To initiate Startup Repair using a Windows installation disk on your Dell computer, follow these steps:
1. Create a Windows installation disk using the Dell OS Recovery tool or obtain a Windows installation disk from another source.
2. Insert the Windows installation disk into your computer.
3. Restart the computer and press the appropriate key (F12 on most Dell computers) to access the One Time Boot menu.
4. Use the arrow keys to select the Windows installation disk as the boot device and press Enter.
5. When the Windows Setup screen appears, select your language preferences and click “Next.”
6. Click on “Repair your computer” in the bottom-left corner.
7. Select the operating system to repair and click “Next.”
8. Choose the “Startup Repair” option.
6. What Are Some Methods To Fix The Dell Automatic Repair Loop?
Some methods to fix the Dell Automatic Repair loop include running system repair tools, performing a system scan in Safe Mode, restoring the Windows registry, and disabling certain features that may cause the loop.
7. What Should I Do If The Dell Automatic Repair Loop Persists?
If the Dell Automatic Repair loop persists after attempting the previous solutions, it may indicate hardware failures. You can diagnose hardware issues and replace faulty components. As a last resort, you can perform a clean installation of Windows.
8. How Do I Back Up Critical Data On My Dell Computer?
You can back up critical data on your Dell computer by using Windows backup options, external storage devices, or cloud storage services. It is important to regularly back up your data to prevent data loss.
9. How Can I Prevent Dell Automatic Repair Issues In The Future?
To prevent Dell Automatic Repair issues in the future, you should regularly maintain your system by performing updates, running system scans, and avoiding actions that may cause system errors. It is also important to keep your hardware components in good condition and handle them with care.
10. Where Can I Find Additional Resources And Support For Dell Automatic Repair?
For additional resources and support for Dell Automatic Repair, you can visit the Dell support website, explore out-of-warranty support options, or search for helpful articles and resources related to Dell repair and troubleshooting. You may also find assistance using your Dell service tag or contacting Dell customer support.